
One key thing you need to remember when altering a pattern is you never, ever want to add width to the outside edges. This creates and ill filling pattern, and while it may look ok in Knits, it will look weird and hang weird in woven fabric.
Ok so we are going to start with our pattern. I have drawn a simple sloper sketch to show you how this works. I would suggest tracing your favorite pattern on some butcher paper for this process so you can re-use your pattern after baby. You will want to make this in a size larger than you would normally wear, you will grow when you are preggo.
We are first going to lay out our lines. I am using different colors to show the two different directions we are going to cut.
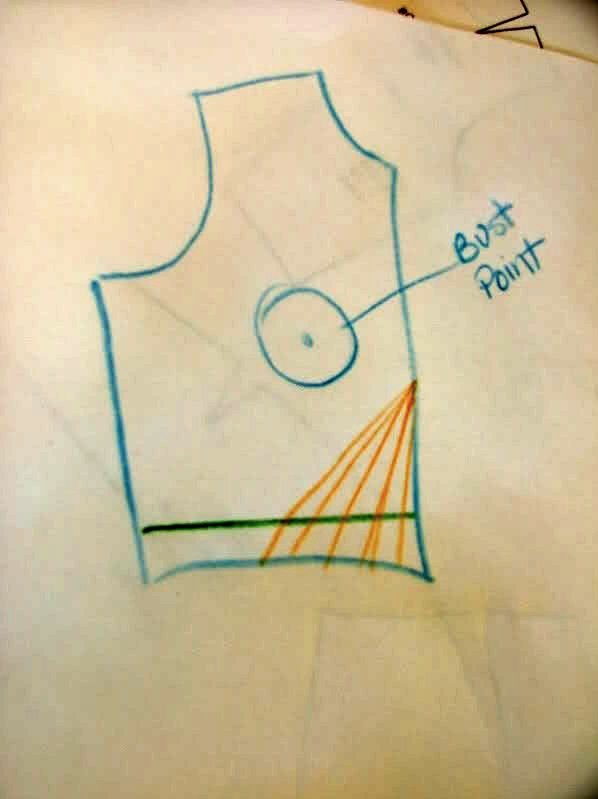
We will want to first to draw our lines to add room for the tummy. One thing to remember is the more cuts you make the smoother and more neat of a transition you will get. Each line will be cut. So starting below your bust point you will want to draw lines starting from one central point to the bottom of your pattern in 1 inch to 2 inch increments.
Being pregnant with #7 I have found that your belly can grow between 15-20 inches by the time its all said and done, so we are going to do a lot of slashing and spreading. You are going to want to make from 10-20 slashes, although my picture dose not show them all.
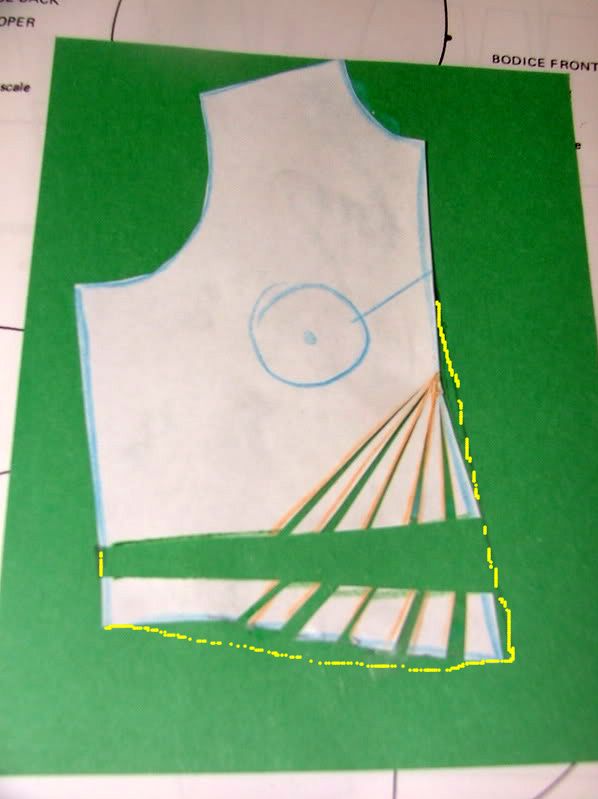
Now we will slash, cutting from the bottom up to the top leaving a tiny bit of paper at the top keeping it attached so we can spread the sections. Place your slashed pattern on top of a new piece of paper. Once you slash your pattern you are going to spread each piece evenly and then tape or glue each piece down.

Now we need to add length. We are going to measure 2 inches up from the bottom, and draw a straight line from side to side (shown in the green line in the first picture). Then we are going to spread this pattern starting from 2 inches in the side seam and ending at 4 inches in the center front. You will repeat this spread on the back, but you will only drop the back 2 inches straight across. Tape or glue down your pattern again.
To finish off your pattern you will clean up the outside lines by redrawing your lines. Unfortunately this is a bit faint in the pencil so this is shown in not so straight yellow lines, make yours straight (or follow the original direct of your pattern if it has curves) lol!
You may wan to add elastic or a tie to the front or back to accommodate your growing belly when you sew this. Thats it you pattern is ready to use!

No comments:
Post a Comment